
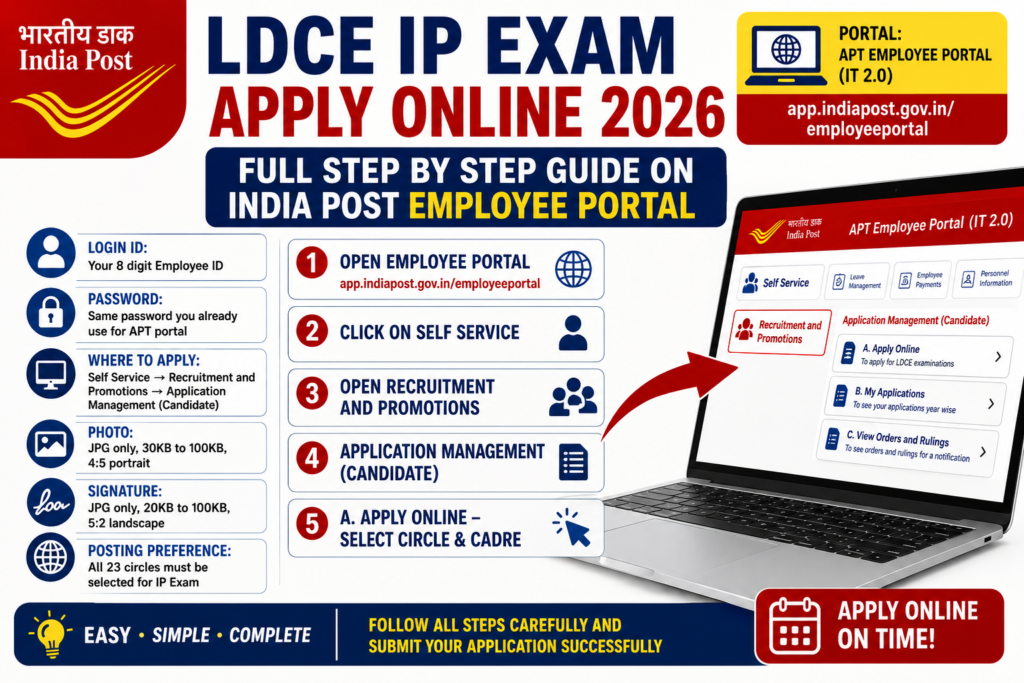
If you are working in India Post and planning to apply for the LDCE IP Exam, this guide is for you. The Department of Posts has now moved the whole application process to the APT (IT 2.0) Employee Portal. There is no separate website. No separate link. You just log in like you normally do and apply from inside.
Many candidates preparing for GDS to MTS, MTS to PA, Postman to PA and other India Post Departmental Exam promotions get confused when a new online system comes. So let us go step by step, in very simple words.
Quick Summary (Read This First)
- Portal: APT Employee Portal (IT 2.0)
- Live URL: http://app.indiapost.gov.in/employeeportal
- Login ID: Your 8 digit Employee ID
- Password: Same password you already use for the APT employee portal
- Where to apply: Self Service → Recruitment and Promotions → Application Management (Candidate)
- Photo: JPG only, 30KB to 100KB, 4:5 portrait
- Signature: JPG only, 20KB to 100KB, 5:2 landscape
- Posting preference: All 23 circles must be selected for IP Exam
Step 1: Open the Employee Portal
There is no special URL for the LDCE IP exam module. All employees have to use the same common employee portal link.
- Go to http://app.indiapost.gov.in/employeeportal
- Enter your Employee ID (8 digit)
- Enter your password (the same one you use for the APT employee portal module)
- Click Sign In
If you forgot your password, use the “Forgot/Reset Password” option on the same login page.
Step 2: Click on “Self Service”
After you log in, your home page will open. The cards you see on the home screen depend on the roles given to you, so everyone’s screen may look a little different. That is normal.
- Look at the right hand bottom corner of the screen
- You will see an icon named Self Service
- Click on it
Step 3: Open “Recruitment and Promotions”
Inside the Self Service Portal you will see many cards like Leave Management System, Personnel Information System, Employee Payments System, Exit Management, Employee Transfers, APAR and so on.
- Click on the Recruitment and Promotions card
- Then click on Application Management (Candidate)
Now three sub cards will open in front of you:
- A. Apply Online – to apply for LDCE exams
- B. My Applications – to see your applications year wise
- C. View Orders and Rulings – to see orders and rulings for a notification
A. Apply Online – How to Fill the Form
Select your Circle and Cadre
- Choose your Parent Circle
- Choose your Lien / Original Cadre
- Click Submit
After this, a dropdown will show all notifications available for your selected cadre and circle. Select the notification you want, and the online application form will load below.
This same flow works for candidates from Delhi Circle, Punjab Circle, Haryana Circle, Rajasthan Circle, Uttar Pradesh Circle, Bihar Circle, Madhya Pradesh Circle, Maharashtra Circle, Gujarat Circle, Tamil Nadu Circle, Karnataka Circle, Kerala Circle, Odisha Circle, Assam Circle and West Bengal Circle.
1. Basic Details
Your Employee Name, Gender, Category, Date of Birth and Disability status will come automatically from the PIS (Personal Information System) module. You do not have to type these.
2. Mobile Number and Email ID
- Enter your mobile number and email ID
- Click Send OTP for both and validate them
Please take this seriously. All future communication and application updates will go only to this updated mobile number and email. So give the number you actually use.
3. Service History
- Present Cadre details will come automatically from PIS
- Feeder Cadre and Feeder Cadre joining date you have to enter yourself
- Your service eligibility is calculated from the Feeder cadre joining date
The system will then show your Eligibility Status – vacancy year, age, age eligibility, service and service eligibility. Check this table carefully before moving ahead.
4. Office Details
- Enter your Parent Office Pin Code
- Click Fetch
- Parent Office Name, Controlling Authority (Verifying Authority) and Nodal Authority (Circle) will fill automatically
5. If You Are on Deputation
Candidates working on deputation (Directorate, CEPT, APS or any other office) should select the deputation option as Yes and enter their deputation office details.
6. Additional Details
You have to answer three Yes/No questions:
- Are you claiming qualifying/eligibility service with respect to your junior as per the notification?
- Is any criminal prosecution pending against you?
- Are you currently under suspension, or is any disciplinary case pending, or any punishment current in your case?
7. Save the First Step
- Check everything once again before clicking Save Above Details
- If all entries are correct, you will see a green message: “Details saved successfully”
- If something is wrong, a red error message will appear
- After saving, the data becomes read only. To change anything, click Edit and the fields will open again
8. Posting Preferences
For the IP Exam, candidates must give preference for all 23 circles. Not some. All of them. The form will not move ahead otherwise.
9. Upload Photo and Signature
| Document | Format | Size | Aspect Ratio |
|---|---|---|---|
| Photo | JPG only | 30KB – 100KB | 4:5 portrait (±10%) |
| Signature | JPG only | 20KB – 100KB | 5:2 landscape (±10%) |
Tip: Get your photo and signature ready in the correct size before you start filling the form. Most of the time gets wasted here.
10. Preview and Submit
- Click Preview and Submit
- All your fetched and entered details will be shown in one page – Employee ID, Name, Gender, Community, Date of Birth, Mobile, Email, Disability, Deputation, Parent Office, Verification Office, Nodal Office, Feeder Cadre and Joining Date, Present Cadre and Joining Date, Designation
- Read it fully. Then click Confirm and Submit
- Tick the declaration check boxes and click Submit Application
If everything is fine, you will get a green message: “Application Submitted Successfully” along with your application number.
Important: After this, no editing is allowed in the application.
If You Get an Error
- A red error message will be shown. Correct the mistake and submit again.
- If the same error keeps coming, raise a Service Desk ticket with a full screenshot of the error, an explanation of the issue, and the option you were using when the error came.
B. My Applications – Track Your Application
Click the My Applications sub card and you will see all your applications for the selected year.
- Click on the application number hyperlink to view and download your submitted application PDF
- Click on Status to see the latest status, and click the button to see the full timeline and disposal of your application
- When the Hall Ticket / Admit Card is issued, the download option will appear on this same screen
Once you submit successfully, your application goes immediately to the Controlling Authority (Verification Authority).
If Your Application is Reverted
If the Controlling Authority marks any field as incorrect, your application comes back to you.
- Status will show as “Verification Reverted”
- Click the “Resubmit Application” hyperlink under the Action column
- The incorrect fields will be highlighted in red and opened for editing
- You can also change your post preferences at this stage if needed
- Correct everything and resubmit
If you have not corrected a field marked as incorrect, an alert message will pop up. You will still be allowed to resubmit, but that is risky.
If you do not agree with the correction asked by the Controlling Authority, meet them in person and sort it out before resubmitting. If the application is not resubmitted correctly within the deadline, any discrepancy can lead to rejection.
Keep checking the My Applications page regularly till the exam date. This is your responsibility, nobody will remind you.
Hall Ticket / Admit Card Download
- Go to My Applications
- Look at the Admit Card column
- Click View to download your Hall Ticket / Admit Card
The View button gets enabled only after your Circle completes the hall ticket generation process. So if it is not clickable yet, just wait and check again.
C. View Orders and Rulings
- Click the View Orders and Rulings sub card
- Select the Exam Year and Exam Name
- Click Submit
All orders and rulings uploaded by the competent authority for that notification will be shown.
Common Mistakes to Avoid
- Giving an old mobile number or email you do not check
- Entering the wrong Feeder Cadre joining date – your whole service eligibility depends on this
- Uploading photo or signature in PNG instead of JPG
- Forgetting to select all 23 circles in posting preferences
- Clicking Submit without reading the preview page
- Ignoring the “Verification Reverted” status till the last day
Preparing for India Post Departmental Exams
Filling the form is only the first step. Clearing the exam is the real work. Whether you are preparing for GDS to MTS Departmental Exam, GDS to Postman / Mail Guard, MTS to PA / SA, Postman to PA / SA, or the LDCE IP Exam, the pattern is the same – you need proper study material, regular practice and previous year papers.
What actually helps:
- GDS to MTS Syllabus and exam pattern, understood properly before you start
- GDS to MTS Previous Year Question Papers and MTS to PA Previous Year Question Papers for real practice
- GDS to MTS Mock Test and India Post Mock Tests to build speed
- GDS to MTS Online Classes – live classes or recorded classes as per your duty timing
- India Post Study Material, question bank and practice sets
- India Post Circulars, latest news and current affairs, because departmental exams ask them
If you are searching for GDS to MTS Coaching, Postman to PA Online Classes, MTS to PA Coaching or Postal Assistant Coaching, choose a course that gives you the complete package – syllabus, study material, mock tests and doubt clearing.
Frequently Asked Questions
Q. Is there a separate website for the LDCE IP Exam? No. There is no separate URL. Use the common employee portal at app.indiapost.gov.in/employeeportal.
Q. What is my login ID? Your 8 digit Employee ID. The password is the same one you use for the APT employee portal.
Q. Can I edit my form after final submission? No. Once you see “Application Submitted Successfully”, no edit is allowed. You can only edit if the Controlling Authority reverts your application.
Q. How many circles do I need to select in posting preference? For the IP Exam, all 23 circles must be selected.
Q. Where do I download my admit card? From the My Applications page, under the Admit Card column. Click View once your Circle generates the hall tickets.
Q. My application shows “Verification Reverted”. What now? Click the Resubmit Application hyperlink, correct the red highlighted fields and submit again before the deadline.
Final Word
The new APT portal process is actually simpler than the old system, once you know where to click. Keep your Employee ID, password, photo, signature and feeder cadre joining date ready before you sit down. Fill it calmly. Read the preview page twice. And after submitting, keep checking My Applications till the exam day.
All the best for your exam.